This is a detailed example of what can be achieved with on scroll animated sequence of images. Idea is simple – animation play and reverse on scroll or touch. All is done within the WordPress UI using Scrollsequence plugin. There is no need for extensive coding. Anyone with moderate PC skills and HTML basics should be able to follow this article and achieve the same effect. Time required to complete is 20-50 minutes, longest is the image preparation phase. If you prefer watching to reading check out the video tutorial below.
Why to add Scroll Image Animation on your website?
User engagement, increased conversions, brand recognition. If users will like what they see, they are much more likely to share your website.
What are you going to learn today?
Today you will learn the easiest and most effective way how to create interactive cinematic web experience. We are going to take a video, chop it up, and convert it to a fresh and new experience that your audience will love. Have a look on the result Beauty Example.

Video Source(s)
The animation is made up of two videos (1, 2) from envato elements library, or you can find the first one on Vimeo (source: https://vimeo.com/433679875). Warning: For commercial use, you need to subscribe to envato elements and you get a license to use it along with full access to their vast database of stock videos. Here is a big list of some other free and paid stock video sources. My personal favorites are envato elements and pexels.
When selecting a video, it is important to pick one, where the motion is smooth, has a good frame rate and we want to avoid motion blur because it simply does not look good when looking at a static image.
Video to image conversion
Converting video to image sequence is a crucial step! There are many tools out there, but not all are the same. Have a read on how to convert video to image sequence. Most important is to convert all frames from the video in desired image quality and resolution. You may not use all images at the end, but select your conversion tool carefully, as some will give you only 30% of the original video frames. Not having enough frames will result in choppy behavior and we like things smooth as silk!
Recommended tools to use are VLC media player and FFmpeg. VLC is a simple, yet powerful and relatively effective way of conversion. Downside of VLC is that it depends on your computer’s performance. You may end up with 70-95% of frames depending on your computer’s performance. FFmpeg is a bit more sophisticated tool. For you to work with it, you need to input into a command line. In return, it will give you all frames in the full resolution. For production, FFmpeg is recommended with Scrollsequence.
| Video (1) | Images |
| Resolution: 1920 x 1080 pixels | Resolution: 1920 x 1080 pixels |
| Duration: 17 seconds | Image Count: 511 |
| Framerate: 29.97 frames / second | |
| Frame count: 17 x 29.97 ~ 510 frames | File Size (each): ~120 kB |
| File Size: 291 MB (uncompressed) | File Size (total): ~15MB |
Due to the nature of the video, where the movement is very slow, and there is not a lot of movement, it is not effective to use every frame. We want to achieve a smooth movement, but at the same time we don’t want to have the animation to be extremely large in size. Therefore, we are going to use only every fourth image, so instead of 511 images we are going to use only about 130. And there is another trick up in our sleeve to reduce the animation size even more. Read on and find out!
File naming is important
You want to name your files in such manner, so they get sorted correctly on your machine and in WordPress media gallery. Especially you want to include leading zeros when numbering the images. See below for example of good and bad file naming structure.
- Bad file naming – image1.jpg , image2.jpg . . . image11.jpg
- Good file naming – image001.jpg, image002.jpg . . . image011.jpg
Image optimization
As this is a basic course, we won’t get into the details of image optimization. Simply you want the images to have the smallest possible size so the page loading speed is fast, while not compromising quality.
For details on how to keep file size to a minimum, read our article about Bulk Image Optimisation. You will learn what tools to use to have the fastest loading speeds, without affecting quality.
It is common to use optimized images that have 40-70kb each in size.
Once you have your images ready, upload them to your WordPress media gallery and let’s roll!
Starting your first Scrollsequence
Click on “Add New Scrollsequence“, then click on “Add page”, page is something like a scene.
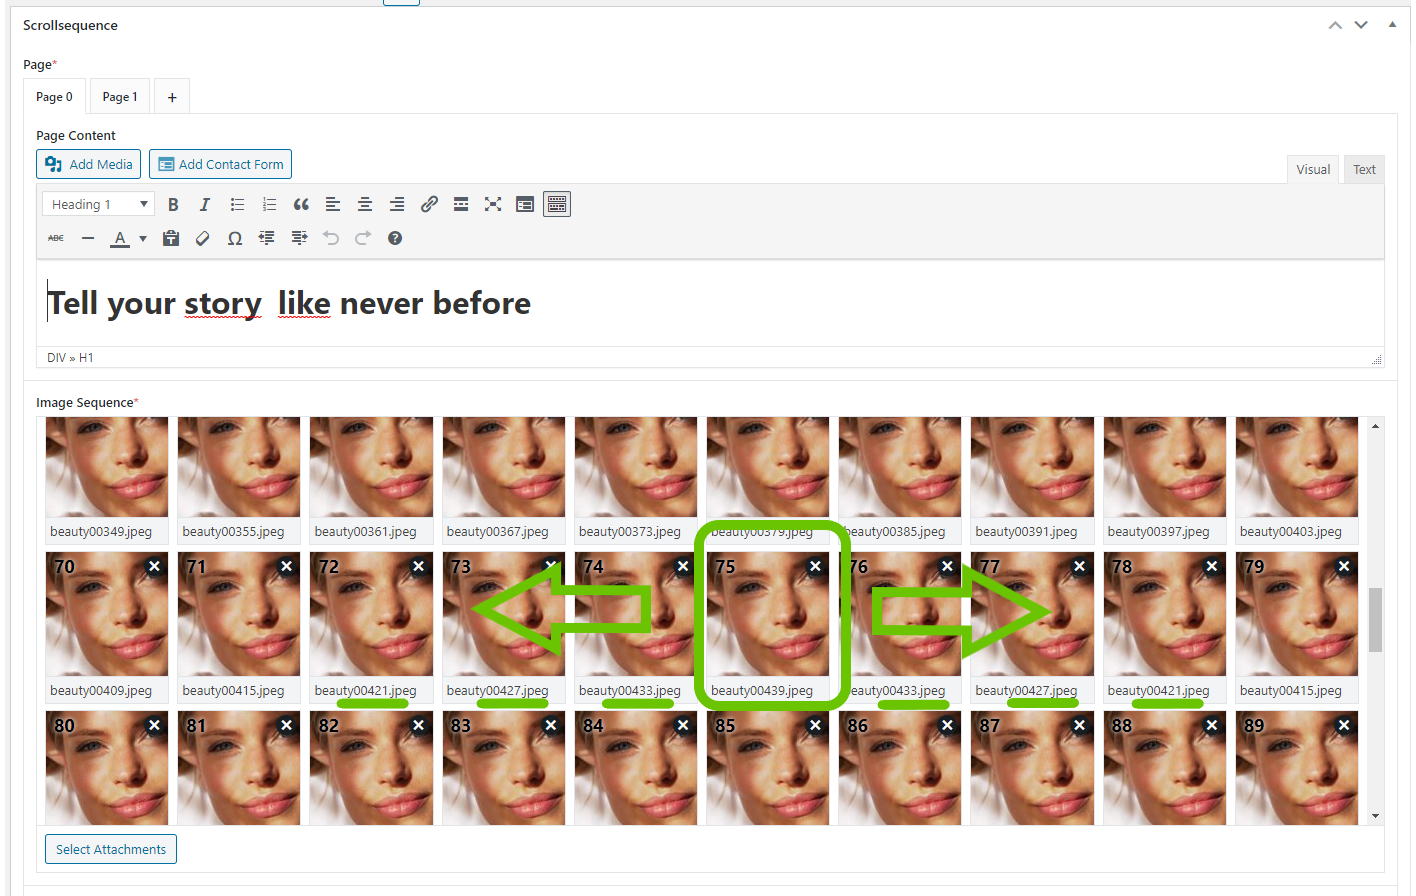
Add images
Add images to the first Page and voila, if you click on view, the animation is already working!
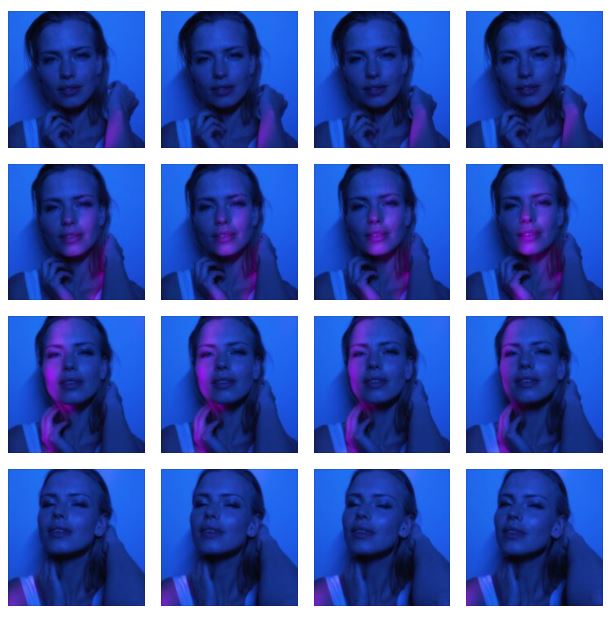
Earlier in the article, I have promised to learn you a neat little trick. If you look at what happens in the video, model opens up her eyes and smiles. It looks the same if you reverse the video. So why not display each image twice, to make the animation longer while using half the amount of images.
Content
Next step is to add content, style it with CSS and animate it. The styling depends on your theme. For the example we have used the TwentyTwenty Theme, so if you are using a different one, it may look different.
Page 0
HTML Content on Page 0
<div id="container1" class="bottom-left">

  <h1 style="display: inline-block; margin-right: 0.5em;">
      Tell your story
  </h1>

  <h1 id="text1" style="display: inline-block;">
      like never before
  </h1>

</div>
Animating Page 0
First let’s talk about CSS selectors. They are building stones of CSS. For use in Scrollsequence they allow you to select any element by either id, or class. When selector starts with “#” it means that it’s an id selector. If a selector starts with a dot ” . “ it means it’s class selector.
1) Id selector #container1
Enter starting frame 0 and ending frame 60.
From Animation – Select “Move From Vertical Offset” of 40% and duration of 40. This means that at frame 0 the elements start from 40% vertical offset and its going to be moving up to its position for the first 40 frames.
To Animation – duration is 19 frames consists and of two separate animations, “Fade To” and “Move To Vertical Offset”. Fade to opacity 0, meaning once the animation finishes, element will not be visible. And move to vertical offset means that once animation finishes, the element will be moved up by -127%.

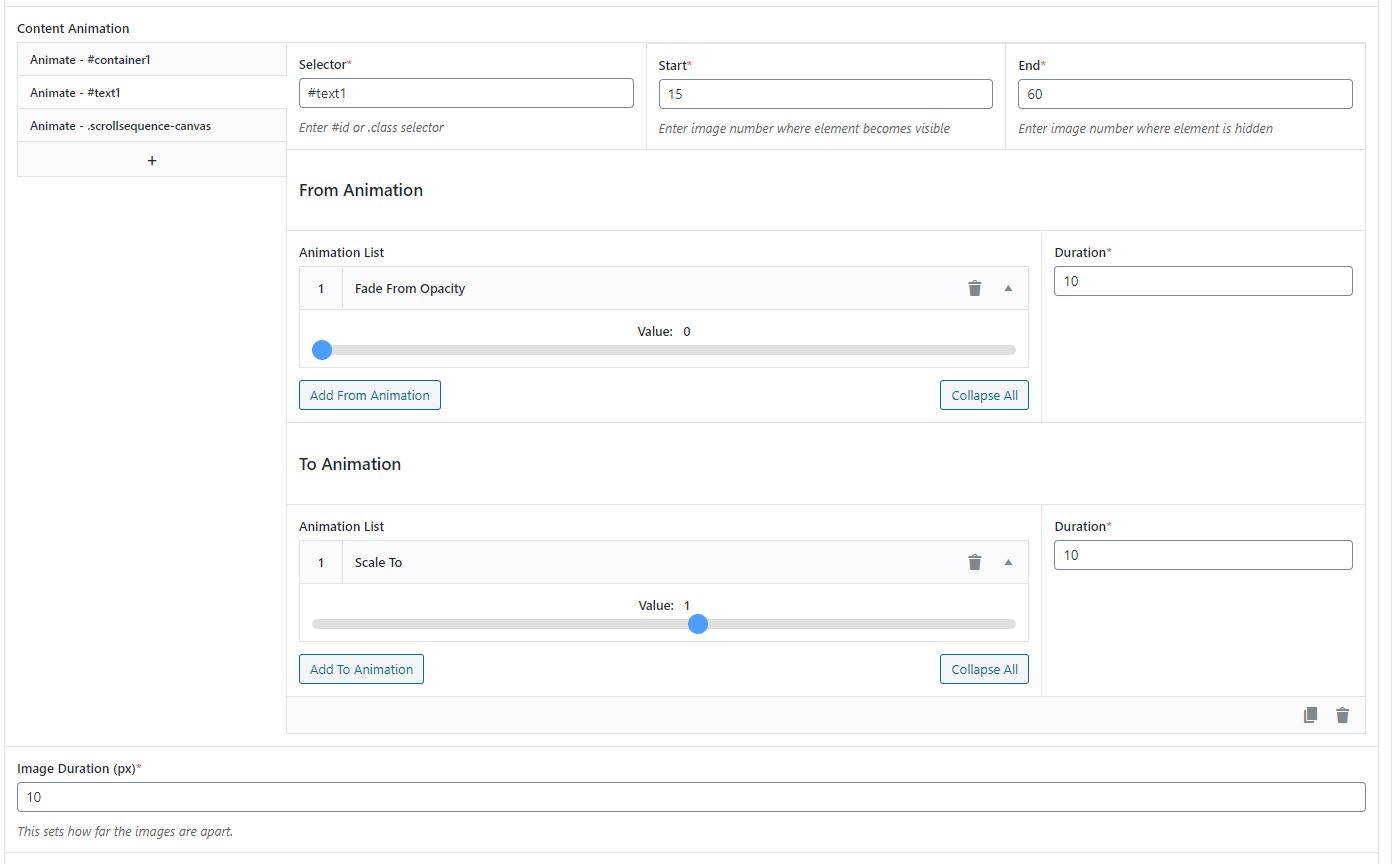
2) Id selector #text1
#text1 is visible between frames 15 and 60. There is fade from opacity applied so it nicely fades into view over the last 10 frames.
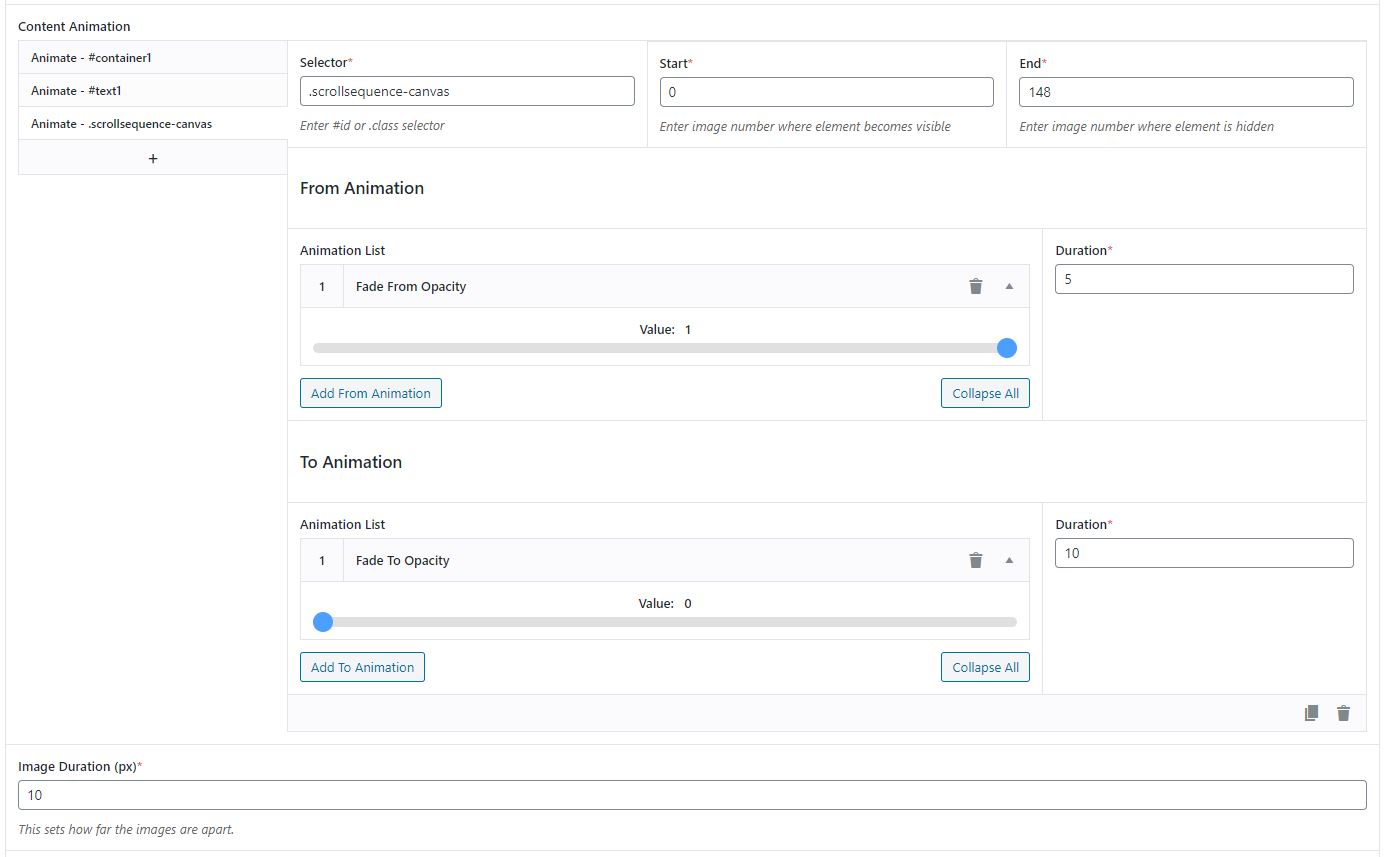
3) Class selector .scrollsequence-canvas
This selector is used to control the properties of the animated background image that is painted on canvas where the images are painted. Canvas is high performance animation API, and it’s used by scroll sequence to provide a smooth animation experience.
We are fading the canvas out, making a seamless experience by gradually fading the canvas out over the last 10 frames.
Page 1
Click on the plus sign on the top of the page to Add Page, repeat the same process and add the exported images from the second video. This time, because the model moves her hands quite quickly, and there is a bit more movement, we are going to use every second frame from the video resulting in 167 frames.
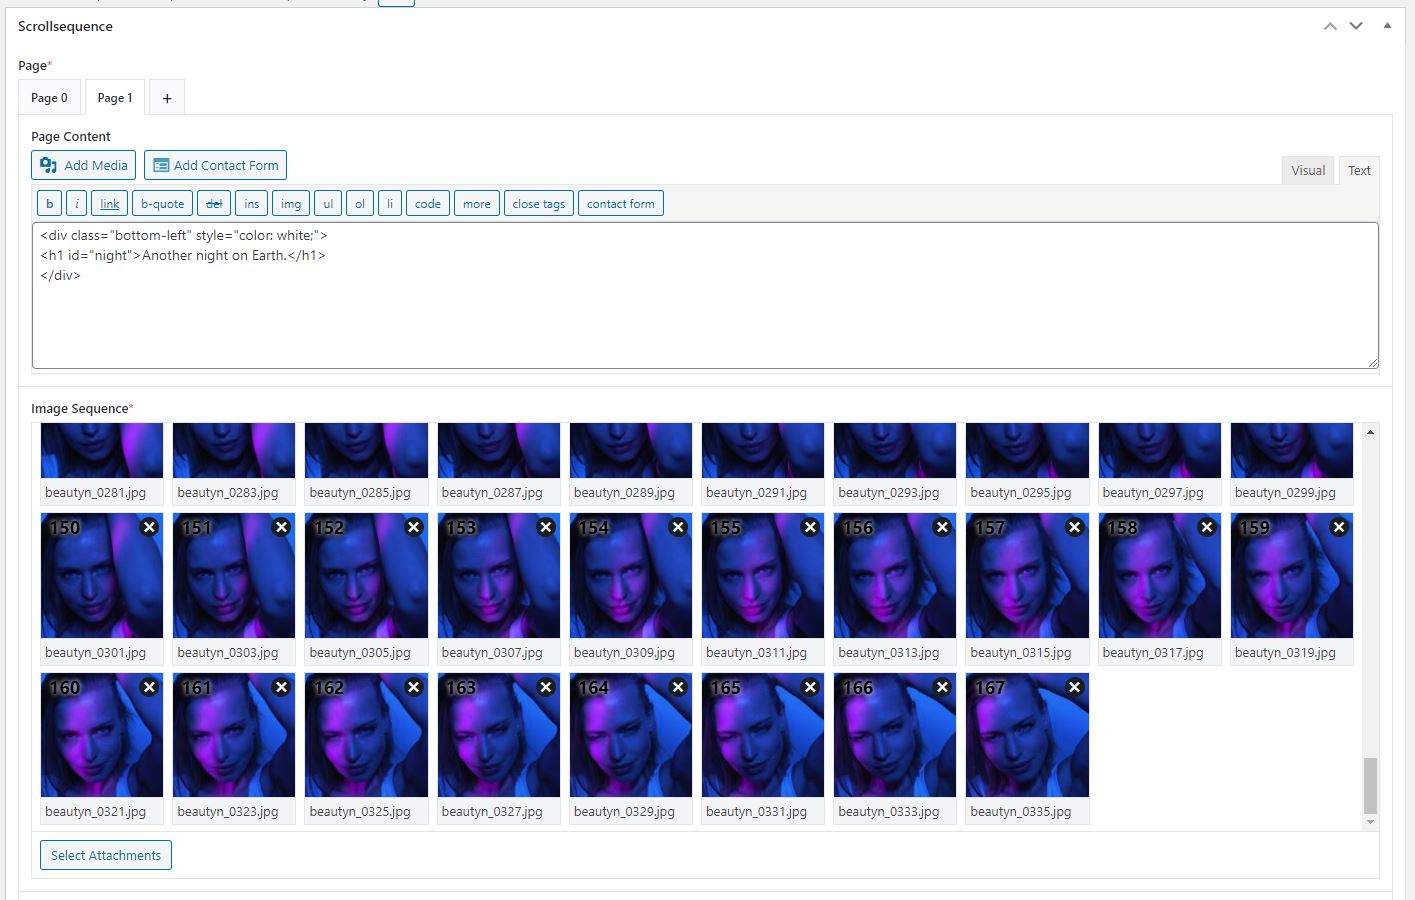
HTML Content on Page 1
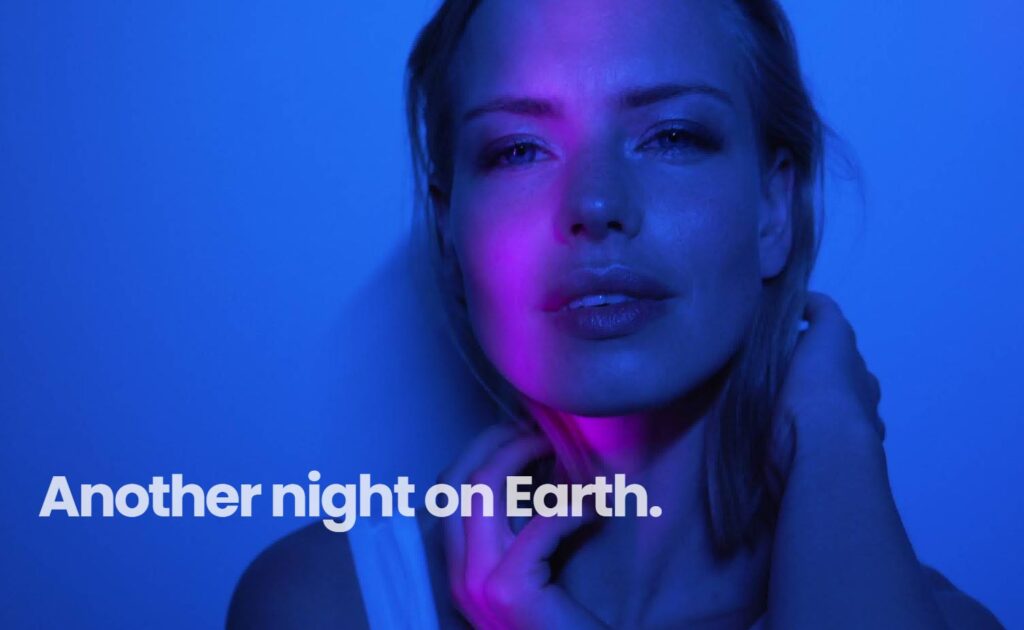
Code below is very simple. There is a div, which ensures alignment of the text, see styling section below for reference. The second is a h1 element with id=”night” that we are going to select and animate.
<div class="bottom-left" style="color: white;">
    <h1 id="night">
      Another night on Earth.
    </h1>
</div>
Animating Page 1
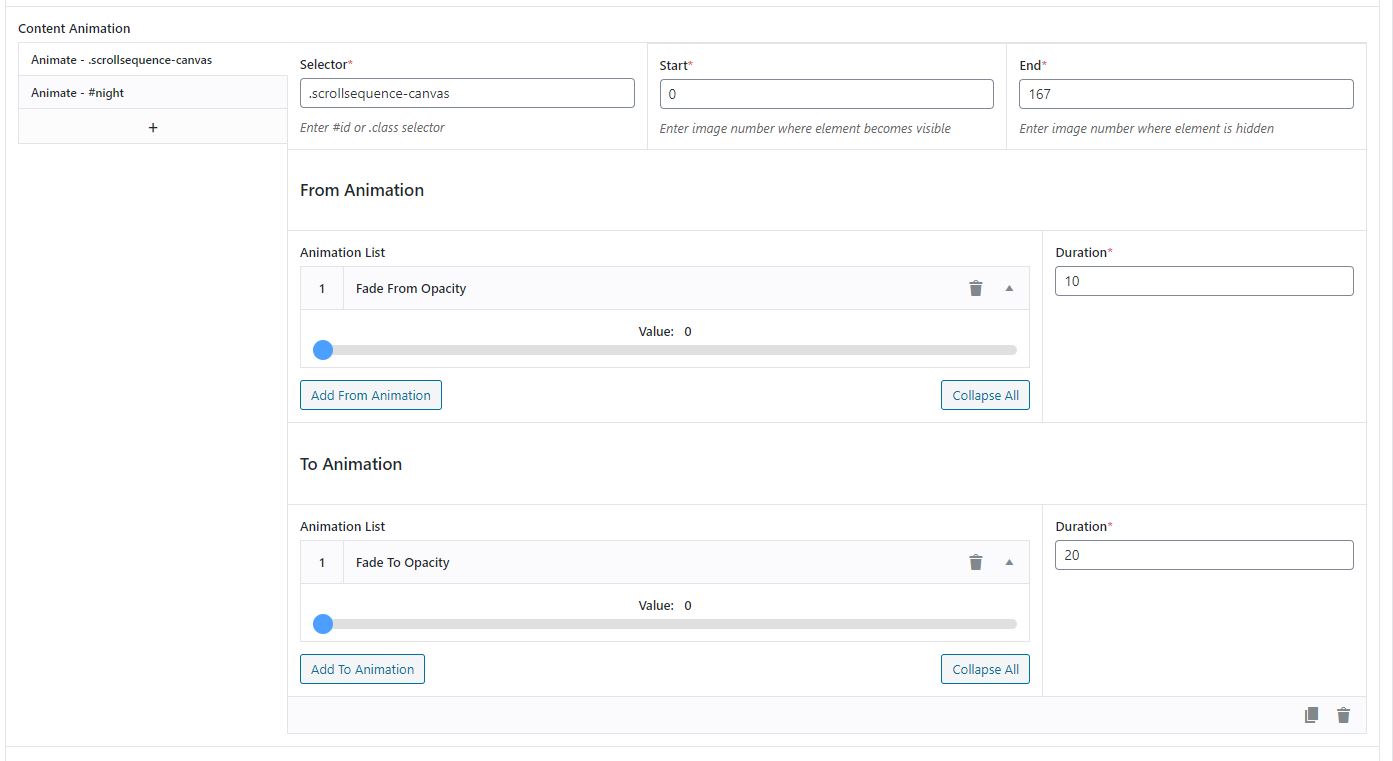
1) Class selector .scrollsequence-canvas
First lets animate the fade in and fade out of the background image sequence. We have faded out the canvas in the last page, so we need to fade it back in. This is done by “From animation” and “Fade From Opacity” where we are going to fade from 0 to default (1) over the first 10 frames. At the end of this page we want the canvas to fade out, so there is a seamless transition to the content after animation is finished.
2) Id selector #night
#night id element is shown between frames 0 to 140 and we want it to Fade From 0 opacity and Move Up, and animate it to fade out to zero again and move up.
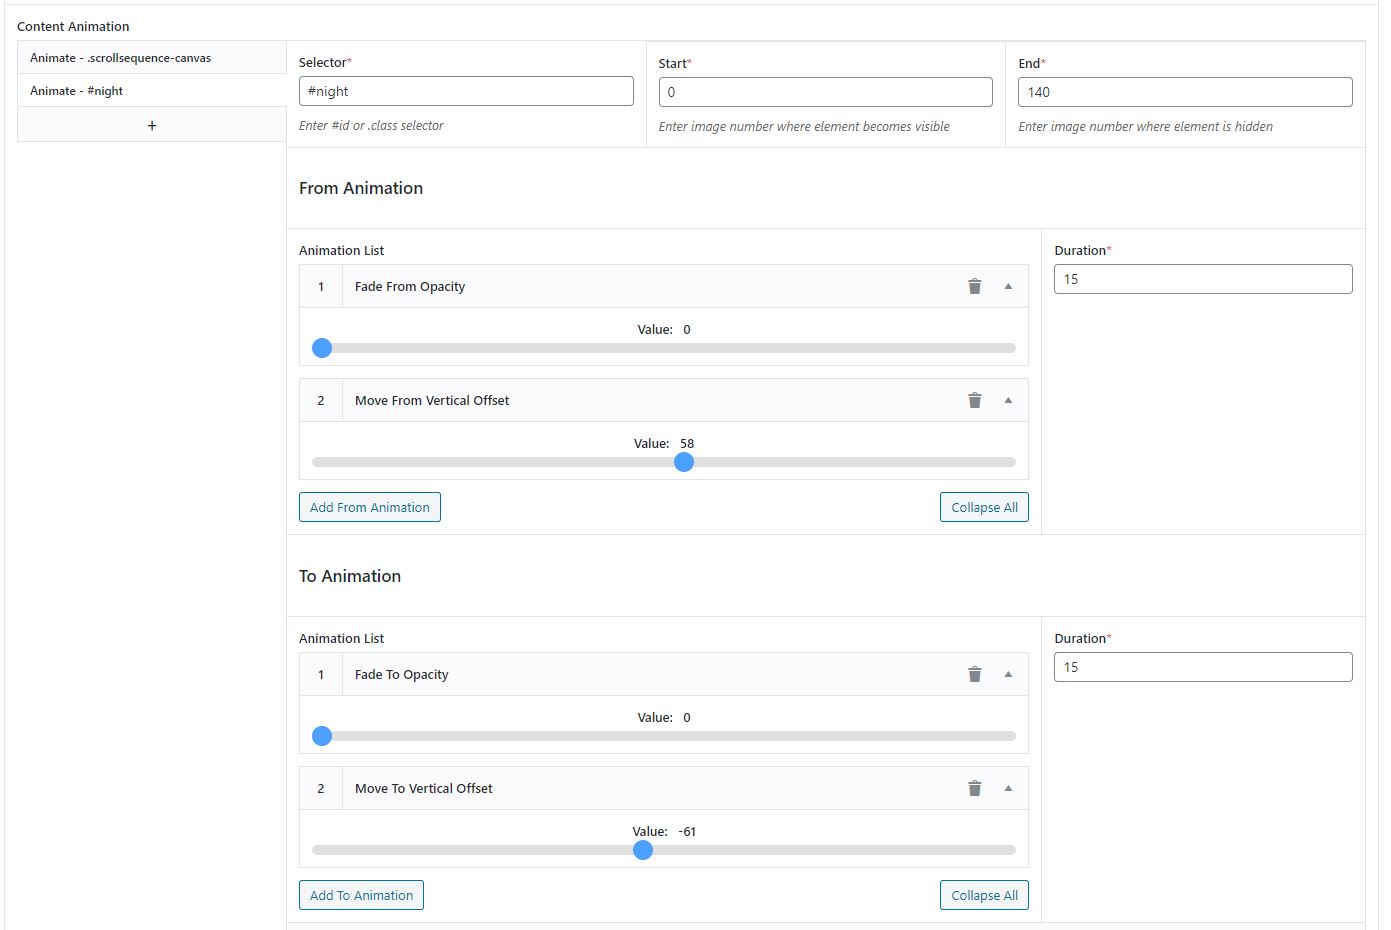
Image Responsivity
To ensure image size and scale look the way we want across all devices, there are few settings. We can scale and align the images for both screen aspect ratios – portrait (mobile) and panorama (desktop). Experiment and adjust the horizontal and vertical alignment to understand its principles. For this course, the best results are if we “Scale to fill” and leave the alignments on center.
Styling
Styling is done via Custom CSS field.
.bottom-left{
position:absolute;
left:4vw;
bottom:13vh;
opacity:0.8;
}


#site-header{
background-color:rgba(255, 255, 255, 0.5)
}
Settings
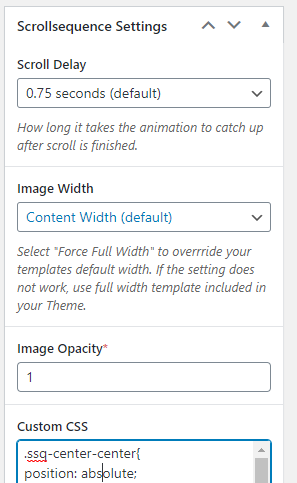
Scroll Delay
Zero delay means that once you scroll, the animation arrives instantly to its end point. If you scroll using a mouse it may seem a bit choppy. As a compromise to achieve a smooth animated effect on all devices, a delay between 0.5-1 seconds is recommended.
Image Width
Depending on your theme, you may want to force full width if your template is in a narrow container.
Image Opacity
With this simple setting you can change the opacity of the animated images, particularly useful if you have a colored background and want some tones of the background to be visible through the image.
Content Editor
At the very end there is another content editor. You may ask yourself – what is this editor doing here? Answer is simple. This is the WordPress native content, that is associated with the Custom Post Type. Whatever you write into it, it will act, as you would be writing a normal post or page.
It also acts as a way to precisely control the position and margins of the scroll sequence that we have just created.
<h1 style="text-align: center;">This is any content displayed before the animated sequence </h1>

[scrollsequence margintop="-155px" marginbottom="-200px"]

<h1 style="text-align: center;">This is any content displayed after the animated sequence </h1>
In the code above, notice that there is a heading before and after the shortcode. This positions the scroll animation between the two headings, simple as that! You can also position it at the beginning or the end of the page.
If you are going to be using the shortcode anywhere else on your blog, don’t forget to add the id option to identify which sequence to display.
Result
Even though this is quite a lengthy tutorial, it gives the full picture and touches all of the main subjects of creating a full page, immersive experience without much coding. If you have any questions or anything to say, comment in the section below!