You have been wondering how to make Sony, Apple, or Samsung style image sequence animation in Elementor? Look no further, we are going to dive deep into the visually striking animation technology.
Scrollsequence allows you to seamlessly Scroll through video cut up to individual image frames. On top of the animation you can add any interactive content and animate it in sync with the video animating in the background. It is available as freemium WordPress plugin.
In this article we are going to discover, how easy it is to encompass the animation sequence in Elementor Page Builder
Elementor is the leading website builder platform for professionals on WordPress. It serves web professionals, including developers, designers.
1. Install Scrollsequence WP Plugin

There is a choice between Free and Pro version of the plugin.
Even with the free version, you can make it work. We also provide a free 14-day trial so that you can check it out for free and upgrade if you like.
2. Create Animation
So, now let’s get down to the exciting part that is creating animation with our Scrollsequence plugin.
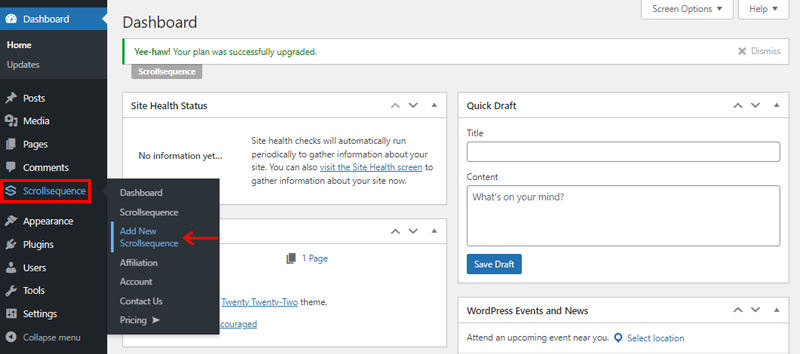
For that, firstly go to the ‘Scrollsequence Menu’ on the left side of your dashboard and click on the ‘Add New Scrollsequence’.
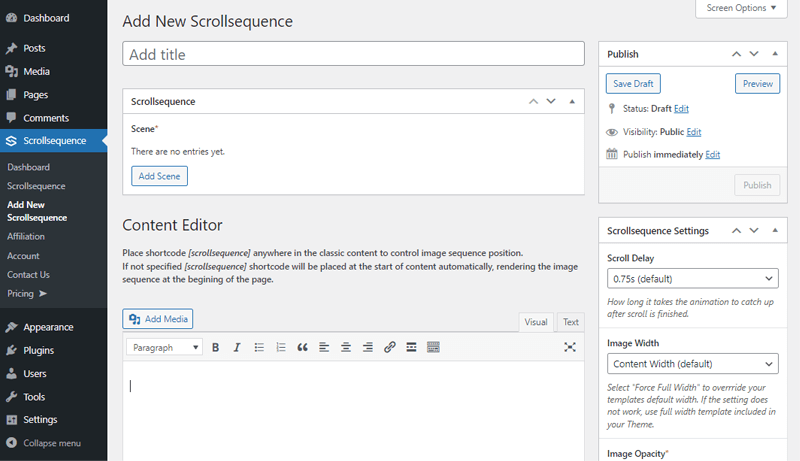
Following that, you need to click on the ‘Add Scenes’ option to add images to create its moving effect. On clicking it, you’ll see that ‘Scene 0’ is created for you to add your images. Also, you can create as many scenes as you want by clicking the Plus (+) icon next to the Scene to add additional scenes.

After you’ve selected and added the images, a new editor section called ‘Fixed Content’ will appear on top of it. It’s used to overlay headlines and other text on top of an image sequence. There is already a default header in place with ‘Another Day on Earth’.
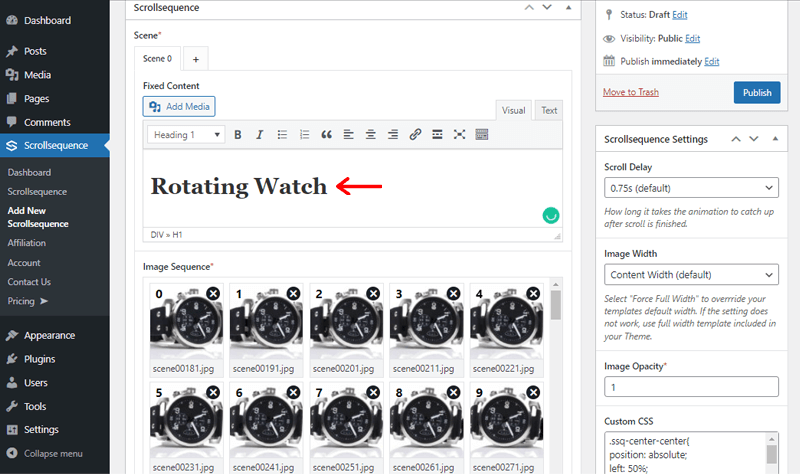
You can wish to alter it to reflect what you want to show. So, here we’ve changed it to ‘Rotating Watch’ for now as shown above.

Also, you can change the heading ID, by clicking on the ‘Text’ editor. You can see that by default, there is ‘on-earth’. So, let’s change into the ‘rotatingwatch’ here as shown above.
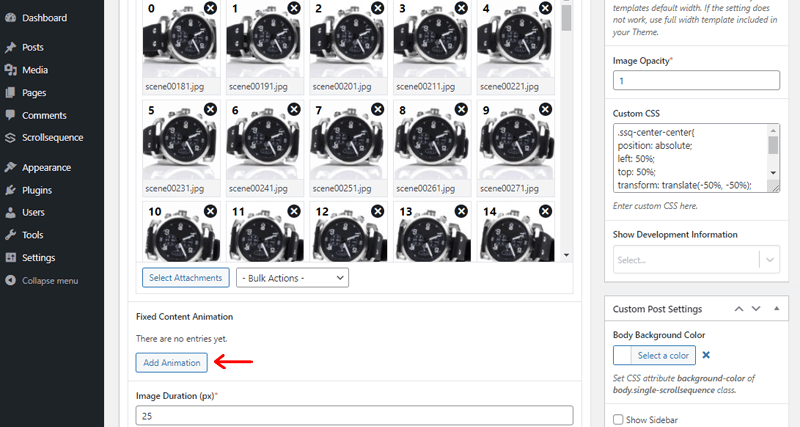
Following that, you can also add animation to your heading. To do so, click on the ‘Add Animation’ button that’s located just below Fixed Content Animation.
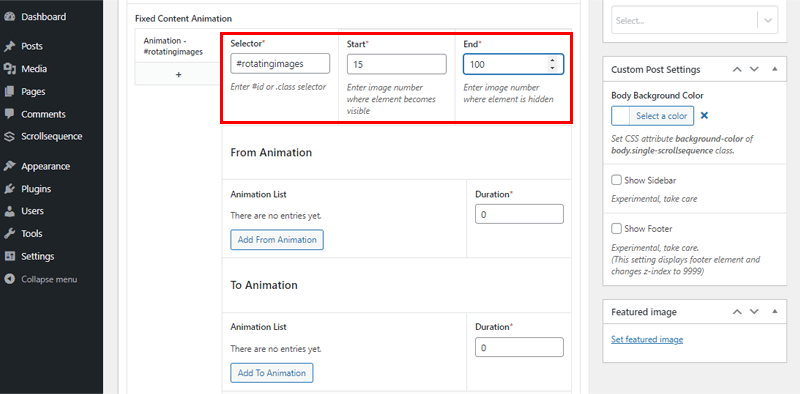
Then, you’ll see a new animation menu appear in the User Interface. There you’ll find 3 options boxes that are:
- Selector: Here, you need to type in the IDs of the elements you want to animate, starting with a hash (#). For example, #rotatingwatch.
- Start: This field is to select the image number where you want the animation to begin. We want the heading animation to appear from image 15. So, let’s put 15 as a starting point.
- End: Enter the image number to bring the animation to a close. So, let’s put the ending point of heading animation as 100.
Following that, you can also, select the animation effects at the start and end of the animation, i.e. ‘From Animation’ and ‘To Animation’ sections.
Here are some useful articles on how to create scroll animation and a general introduction tutorial. With that out of the way, let’s get to the core!
3. Add Scrollsequence Image Animation To Elementor
Let’s go ahead and add animation using the Elementor page builder. Also, do make sure that you’ve already installed Elementor whether free or premium.
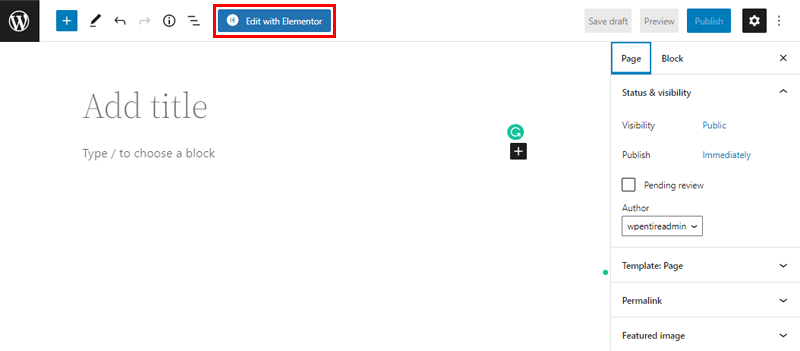
Now, you should go to the page where you want to add the animation and click it in ‘Edit with Elementor’ as shown above.
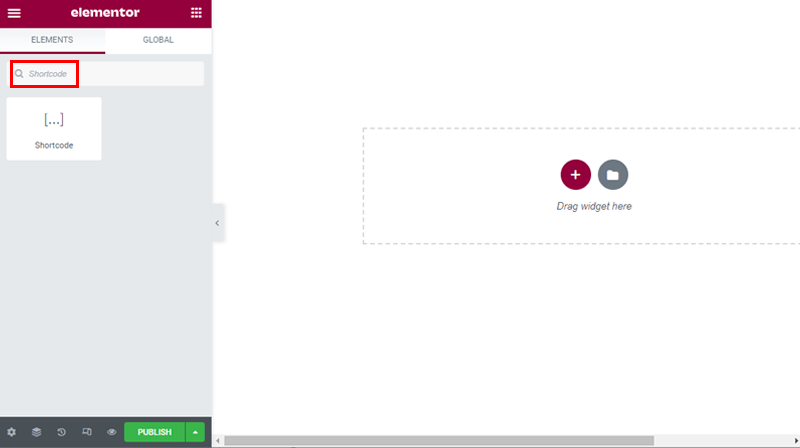
Following that, you’ll see the Elementor page editing interface. After that, search for the ‘Shortcode’ widget in the left sidebar. Then, you’ll see the shortcode widget just beneath it. You can drag and drop the widget in the page area at the right.
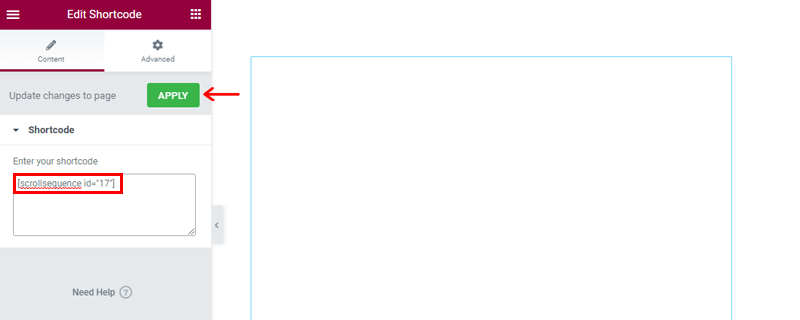
In the left sidebar, you’ll see the ‘Enter your shortcode’ box. There, you need to paste the shortcode of your animation that you copied last time. Afterward, you’ll need to click on the ‘Apply’ option.
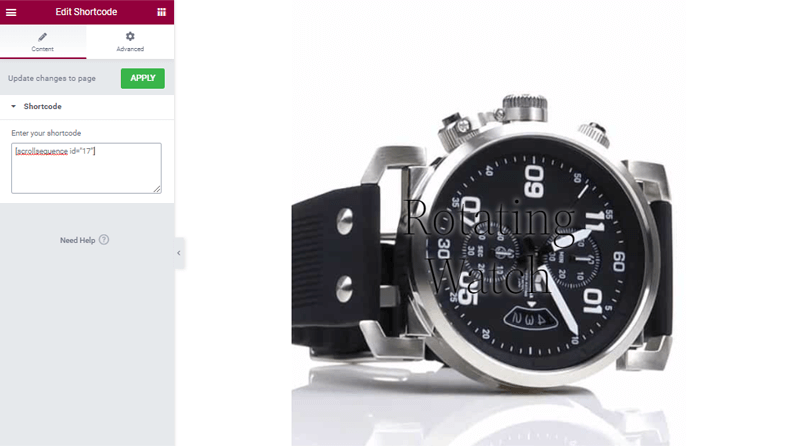
Following that, you’ll see a page as shown above. As mentioned before, our ScrollSequence plugin seamlessly integrates even on the backend of these popular page builders.
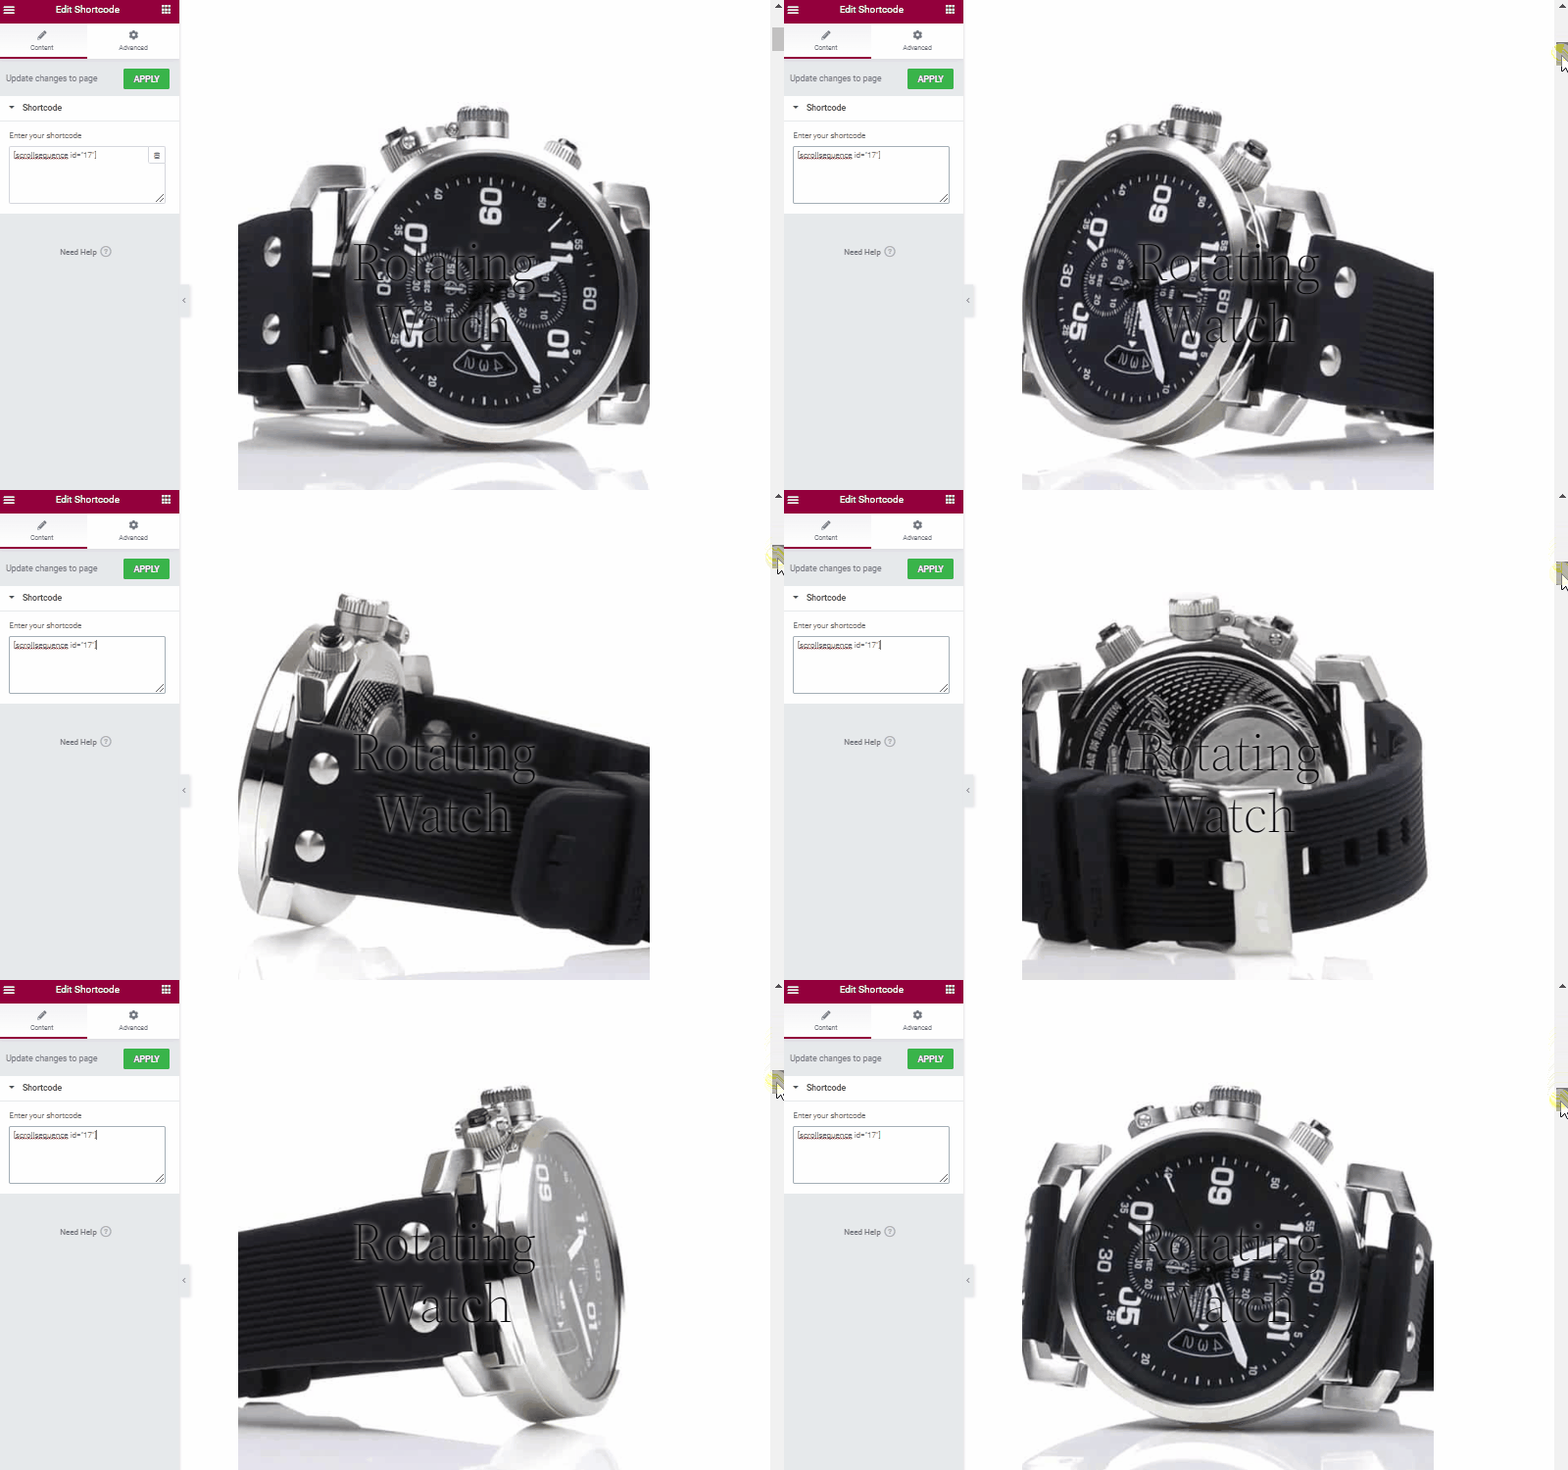
As shown in the above GIF, you can Live Preview your scroll image animation right from your backend. In addition, this saves a lot of time as you’ll not have to switch back and forth between your frontend and backend.
Once everything is finalized, now all you need to do is click the ‘Publish’ button at the end of the page. Pretty easy right?
More From This Series
1. Add Image sequence animation to Elementor
2. Add Image sequence animation to Divi
3. Add Image sequence animation to Beaver Builder
Conclusion
That’s it, folks! We’ve come to the end of our article on how to make scroll image animation and integrate it Elementor in WordPress.
We genuinely hope you enjoyed this article and now can make scroll image animation effortlessly and add it with various page builders using our Scrollsequence plugin.
If you’ve any queries or confusions related to making scroll image animation or Scrollsequence plugin, then leave a comment below. We’ll respond to you as soon as possible. Also, if you’re already using it to make animation, do leave your thoughts below.
Lastly, don’t forget to share this article with your friends and family. Do follow us on Facebook,and Twitter for more related articles.